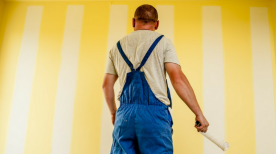
Do you want to repaint a wall, a ceiling, or an entire room with your own hands? What a good idea! But you are not a painting artist, you are afraid of making a mistake their painting jobs . Don't worry, we'll give you our tips for success and don't skip any steps to get the best possible result. So here are 10 common painting mistakes that can cost you dearly and how to avoid them.
Mistake n?1: Not protecting your site sufficiently
Our advice for preparing your construction site:
- Empty the room as much as possible
- Remove rugs and curtains to avoid paint splashes
- Remove all objects that may interfere with the application of the paint on the wall (pictures, screws, shelves, etc.)
- Disconnect your switches and electrical outlets so as not to overflow on them
- Protect your floor with plastic sheeting secured with tape
- Dress in old clothes and wear a cap to protect your hair.
- Equip yourself with a mask, latex gloves and protective glasses if you paint with solvent paint (Glycero) or use a stripper.
Mistake n?2: Neglecting the state of its support
Steps to consider before you start painting:
It is important to check that the surface you want to paint is in good condition before you start painting. First of all, if the latter is dirty (fingerprints, stains, etc.) we recommend that you wash it (from bottom to top to avoid drips) using a detergent diluted in water. water then rinse with water before letting it dry completely. If cracks are present on the surface concerned, take care to fill them with the filler then apply sanding so that it is perfectly smooth.
Mistake #3: Not having the right tools
Better tools, better results: It is essential to have the right tools and in good condition for a successful painting project. Indeed, the use of rollers or brushes in poor condition is very likely to complicate your work in addition to resulting in an irregular rendering mixing drips and splashes.
For your tools, we advise you to choose brushes with raw wood handles rather than plastic or painted wood, the latter provide a better grip. Your brushes should obviously be tapered and have long, well-set bristles. In addition, you also have to pay attention to the types of bristles of your brushes depending on the paint you will be using. As for water-based paint, we recommend the use of brushes with synthetic bristles, unlike solvent-based paint where the use of brushes with wool or natural bristle bristles would be more appropriate. To paint on flat surfaces, favor flat brushes. However, to paint the corners of the walls or the moldings, opt for round brushes.
Concerning the choice of your rollers, it is important to know that rollers with short hairs are reserved for glossy paints and lacquers, those with short hairs are optimized for mattes and satin finishes, while rollers called "anti- drops" will be essential for painting on ceilings.
Finally, don't forget to bring protective adhesive tape and a large tray with a grid that will allow you to remove excess paint before using the roller.
Mistake n?4: Not testing your paint before the first coat
In order not to make a mistake when buying cans of paint, it is recommended to test the color or colors of your choice directly. For this, some paint brands offer 100ml jars called "testers", these are available in large DIY stores such as Leroy Merlin. To test your shades, we advise you to apply the tester(s) to a white piece of cardboard then place it in different places in the room at various times. In this way, you will be able to see whether or not the chosen color is the most suitable.
Error #5: Miscalculating the amount of paint needed
We advise you to always apply a second coat for a better result even if the term "single coat" is sometimes indicated on your paint can. However, be careful not to overload your brushes to avoid consuming too much and running out of paint before you have finished your project.
Error #6: Not applying an "undercoat" or "grip"
What is the difference between undercoat and paint?
It is common that people do not take care to apply an undercoat before applying the paint. However, this is an essential step in the process, without this undercoat it is possible that the paint adheres less well to the support or that it is absorbed by the pores of your wall, thus forcing you to add additional layers by the following. The undercoat also allows you to have a perfect and lasting result over time.
How long between undercoat and paint?
The waiting time / drying time between undercoat and first coat depends first of all on the type of paint you have selected. Today, the paints have evolved and the waiting time too, to know the duration between the undercoat and the first coat of paint, we invite you to look behind your can of paint. You will find on it three waiting times depending on your objective: "dry to the touch", "between 2 coats" and "complete drying". Please note, we recommend that you follow the time indicated on the paint pot to avoid the risk of marks, and never exceed the time indicated between coats to prevent the paint from sticking.
Mistake n?7: Confusing oil paint and water-based paint
Another mistake to avoid is to confuse oil paint, called ?glycero? and water-based paint, called ?acrylic?. Indeed, these two types of paints differ on many points, the oil paint is solvent-based allowing a simpler and more resistant application. However, it is polluting or even harmful because of the fumes of solvents, in addition to diffusing a strong odor. It can also happen that the "glycero" ages badly and yellows over time. Water-based paint, on the other hand, releases almost no odor and is composed of very few solvents that are harmful to the environment. However, it still remains less resistant than oil paint.
Error n?8: Choosing the wrong finish
There are several paint finishes with their own characteristics and resulting in different renderings, so it is important to choose well.
Matt paint
- Powdery texture
- Deep rendering
- Not washable
- Not suitable for damp rooms
Glossy paint
- Reflecting light
- Easy to clean
- Requires 3 / 4 coats
Satin paint
- Universal
- Suitable on any support
Error #9: Too much paint or not enough
The steps to properly dose your paint:
- Widely cover with adhesive tape the areas where you are likely to overflow
- Stir the paint properly
- Dip the roller only halfway
- Remove the excess on the grid
Mistake #10: Painting in bad conditions.
Our final tip is to focus on good conditions when embarking on a painting project. Indeed the application of paint can be complicated depending on the climate, for example in the middle of winter or during a period when the humidity is high, the paint will be sticky and the drying will therefore take longer. On the contrary, in summer when it is very hot, the drying will be too fast, which can have a negative impact on the durability of your paint.